Master the Art of Trading with the MT5 Backtesting Simulator – Optimize Your Strategies for Success

MT5 backtesting simulator

Introduction to the MT5 Backtesting Simulator

The MetaTrader 5 (MT5) platform is a popular trading platform used by millions of traders worldwide. It offers a range of advanced tools and features to support various trading strategies. One of the most important aspects of successful trading is the ability to analyze and test strategies using historical data. This process, known as backtesting, allows traders to determine the potential effectiveness of a trading strategy before risking real money. In this article, we will delve into the MT5 backtesting simulator, a powerful tool that enables traders to optimize their strategies with ease.

Getting Started with the MT5 Backtesting Simulator

To begin using the MT5 backtesting simulator, you’ll first need to download and install the MetaTrader 5 platform. You can download the platform from the official MetaQuotes website or your broker’s website, depending on your preferences. Once installed, create a demo account to access the backtesting features without risking real funds.

Selecting the Market and Trading Instrument

After setting up a demo account, choose the desired market and trading instrument you wish to backtest. MT5 supports a variety of markets, including forex, stocks, indices, and commodities. Simply navigate to the “Market Watch” window, find the instrument you want to backtest, and drag it onto a new chart.

Choosing the Appropriate Time Frame

The next step is to select the time frame that best suits your trading strategy. The MT5 backtesting simulator supports various time frames, ranging from one minute to one month. Keep in mind that choosing the right time frame is crucial, as it can significantly impact the accuracy and relevance of your backtesting results.

Configuring the Backtesting Environment

Before running a backtest, you’ll need to configure the backtesting environment to ensure accurate results. This includes acquiring historical data, adjusting backtesting parameters, and setting up the appropriate modeling method.

Acquiring Historical Data

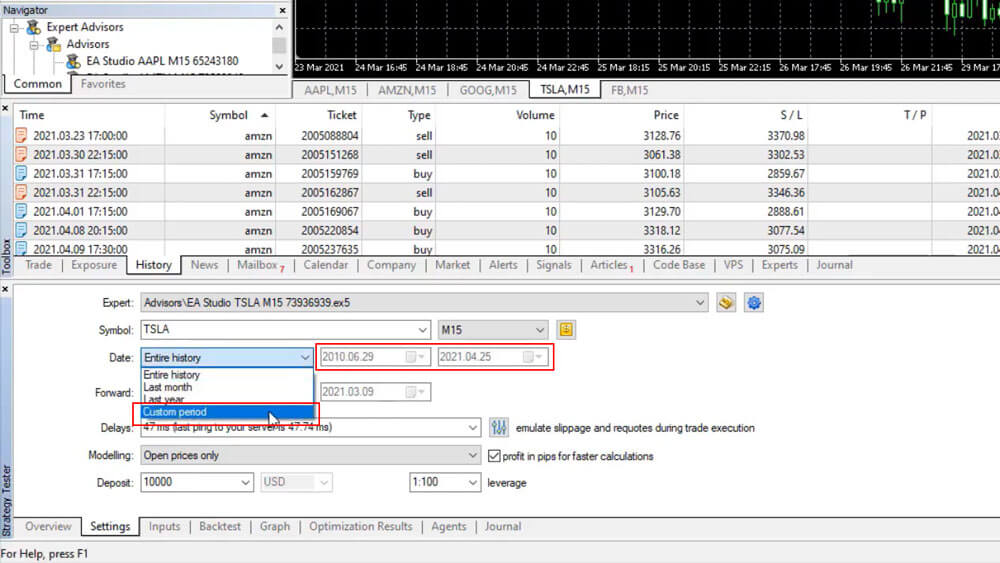
The quality of historical data is paramount for accurate backtesting. The MT5 platform provides built-in historical data for various trading instruments, which you can access by navigating to the “History Center” (F2). If you require more extensive or custom data, you can import it from external sources, such as paid data providers or your broker.

Adjusting the Backtesting Parameters

Once you have acquired the necessary historical data, you’ll need to adjust the backtesting parameters. These include the spread settings, modeling method, and optimization parameters. The spread settings determine the difference between the bid and ask prices, which can significantly affect your strategy’s performance. The modeling method determines how the MT5 backtesting simulator will process the historical data, with options such as “Every tick,” “1-minute OHLC,” and “Open prices only.” Finally, optimization parameters are used to fine-tune your strategy, allowing you to test multiple variations to identify the most effective approach.

Expert Advisors (EAs) and Indicators

In the MT5 platform, trading strategies are implemented using Expert Advisors (EAs) and Indicators. These are programmable scripts that automate trading decisions and provide insight into market conditions.

Overview of Expert Advisors and Indicators

Expert Advisors are algorithmic trading systems that execute trades based on predefined rules and conditions. They can automate complex strategies and help traders save time and minimize human errors. Indicators, on the other hand, are visual tools that analyze price movements and provide insights into market trends, momentum, and volatility.

Built-in EAs and Indicators in MT5

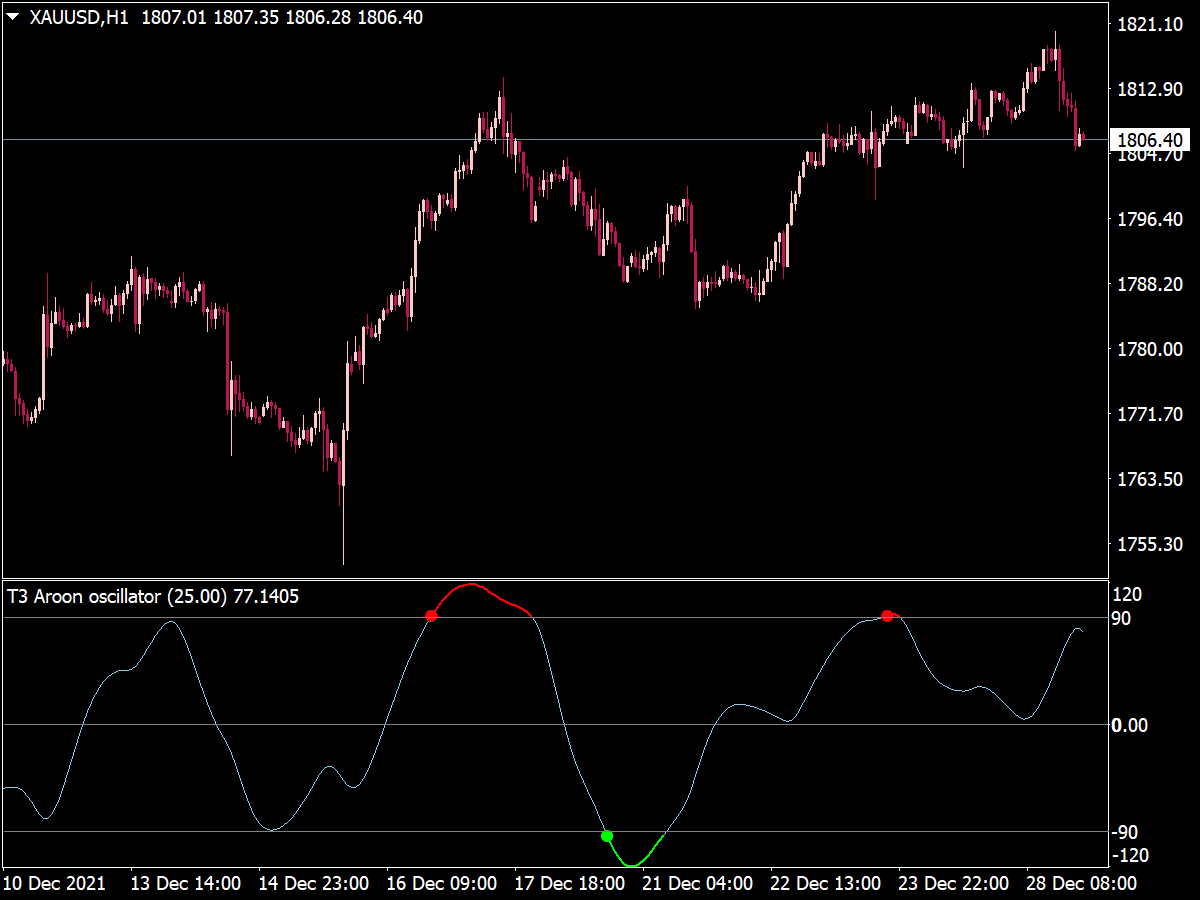
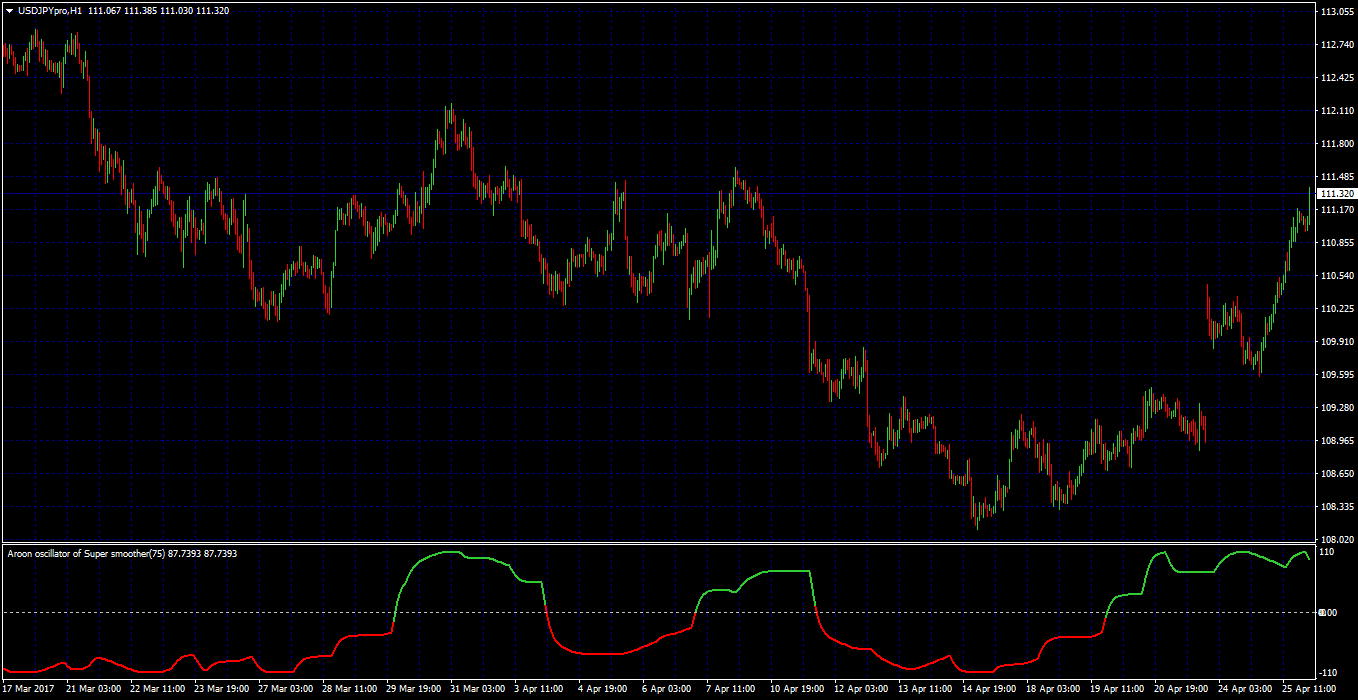
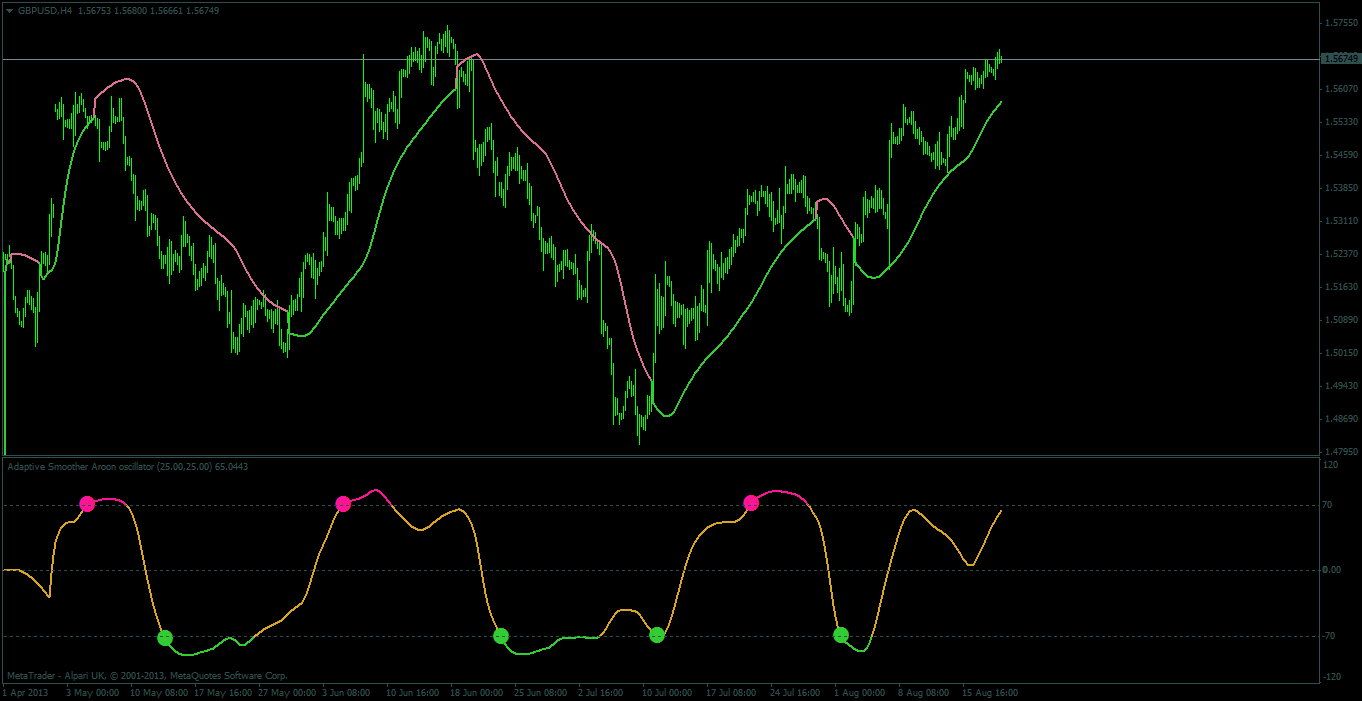
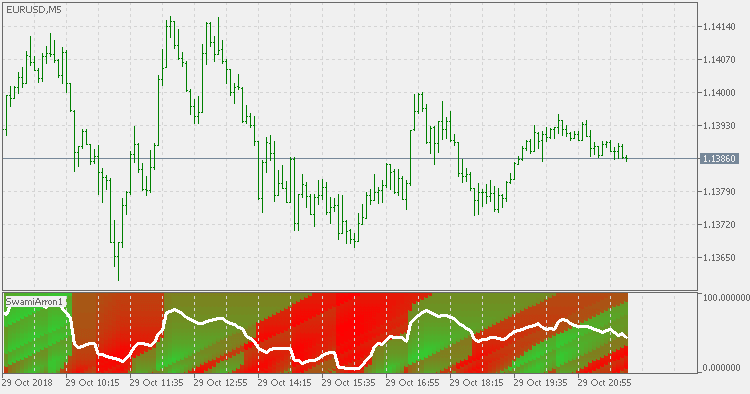
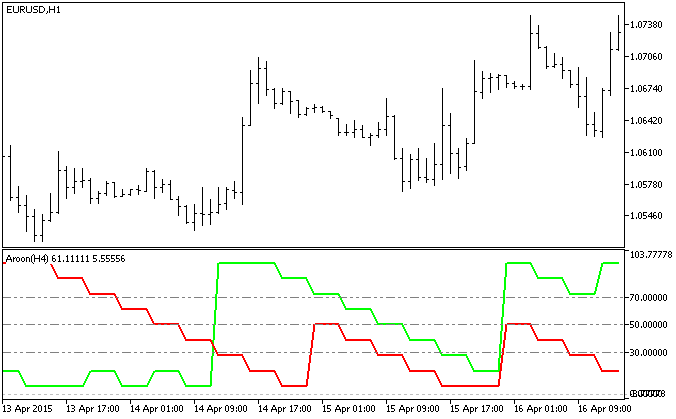
The MT5 platform comes with a range of built-in EAs and Indicators that cater to various trading styles and strategies. Some popular built-in Indicators include the Moving Average, RSI, and MACD, while built-in EAs include the Moving Average Crossover and the MACD Sample. These built-in tools can serve as a starting point for building and testing your trading strategies.

Importing Custom EAs and Indicators

If you require more specialized EAs or Indicators, you can import custom tools developed by third-party programmers or create your own using the MetaEditor. This feature allows you to tailor your trading strategies to suit your specific needs and preferences.

Configuring EAs and Indicators for Backtesting

Once you’ve selected the appropriate EAs and Indicators, you’ll need to configure their settings for the backtest. This includes adjusting parameters such as the entry and exit criteria, risk management rules, and trading conditions. Ensure that these settings align with your intended trading strategy to achieve accurate backtesting results.

MT5 backtesting simulator

Running the MT5 Backtesting Simulator

With your backtesting environment configured and your EAs and Indicators set up, you’re now ready to run the MT5 backtesting simulator.

Initiating the Backtest

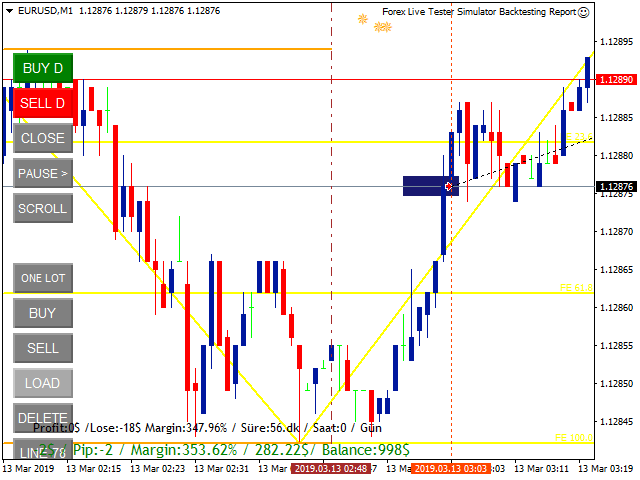
To start a backtest, open the “Strategy Tester” window (Ctrl+R) and select your desired EA from the “Expert Advisor” dropdown menu. Configure the necessary settings, such as the trading instrument, time frame, and date range for the backtest. Once you’re satisfied with your selections, click “Start” to initiate the backtest.

Monitoring the Backtest Progress

During the backtest, you can monitor its progress in the “Strategy Tester” window. This includes information on the number of trades executed, the current profit or loss, and the percentage of the backtest completed. Keep an eye on these metrics to ensure that the backtest is running smoothly and as expected.

Analyzing the MT5 Backtesting Simulator Results

After the backtest has concluded, the MT5 backtesting simulator will generate a detailed report with various performance metrics. These include:

  1. Summary statistics: This section displays key performance indicators such as total net profit, the percentage of profitable trades, and the Sharpe ratio.
  2. Trade history: A list of all trades executed during the backtest, including entry and exit prices, trade duration, and profit or loss.
  3. Equity curve: A graphical representation of your strategy’s performance, illustrating the growth or decline of your account balance over time.
  4. Drawdown analysis: A measure of the largest peak-to-trough decline in your account balance, providing insights into the potential risk of your trading strategy.

Optimization and Fine-Tuning

To further improve your trading strategy, you can utilize the MT5 backtesting simulator’s built-in optimizer to fine-tune your parameters and settings.

Using the Built-in Optimizer

The optimizer allows you to test multiple variations of your strategy simultaneously, helping you identify the optimal combination of parameters for maximum performance. To access the optimizer, simply select “Optimization” in the “Strategy Tester” window and configure the settings as required.

Setting Optimization Criteria

To ensure that the optimizer provides meaningful results, you’ll need to set specific optimization criteria. These can include factors such as the net profit, drawdown, or the Sharpe ratio. By selecting the most relevant criteria for your strategy, you can ensure that the optimizer identifies the best possible parameter combinations.

Analyzing Optimization Results

After the optimization process is complete, the MT5 backtesting simulator will generate a comprehensive report detailing the performance of each tested variation. Carefully analyze these results to determine which parameter combinations delivered the best overall performance.

Implementing Improvements to the Trading Strategy

With the insights gained from the optimization process, you can make necessary adjustments to your trading strategy, such as fine-tuning entry and exit criteria or implementing more effective risk management rules. This iterative process can help you continually improve your strategy, potentially leading to increased profitability and reduced risk over time.

MT5 backtesting simulator

Conclusion: The Importance of the MT5 Backtesting Simulator

The MT5 backtesting simulator is a powerful tool that can significantly contribute to a trader’s success by allowing them to test and optimize their trading strategies using historical data. By harnessing the advanced features and capabilities of the MT5 platform, traders can gain valuable insights into the potential performance of their strategies and make data-driven decisions to enhance their trading approach.

By committing to a continuous process of learning, testing, and improvement, traders can leverage the MT5 backtesting simulator to minimize risk, maximize returns, and ultimately achieve greater success in their trading endeavors.

Master the Williams Alligator TradingView for Profitable Trading Decisions

williams alligator tradingview

Introduction

The Williams Alligator indicator is a versatile and robust technical analysis tool that helps traders identify trends and potential reversals. Developed by Bill Williams, the Alligator indicator consists of three smoothed moving averages (Jaw, Teeth, and Lips) that represent different timeframes. When combined with the powerful TradingView platform, the Williams Alligator TradingView integration allows traders to maximize the effectiveness of this indicator for improved trading decisions.

Getting Started with TradingView

To begin using the Williams Alligator TradingView integration, you first need to familiarize yourself with the TradingView platform.

Creating an Account

Visit the TradingView website and sign up for a free account. You may also opt for a paid subscription plan for additional features, such as access to more indicators, real-time data, and premium customer support.

Exploring the TradingView Interface

Once you’ve created your account, explore the TradingView interface to become familiar with its features, such as the chart area, drawing tools, time frame selection, and watchlist panel.

Selecting a Chart Type and Time Frame

TradingView offers various chart types, including candlestick, bar, and line charts. Choose your preferred chart type and select an appropriate time frame for your trading strategy, ranging from minutes to months.

Adding the Williams Alligator Indicator to Your Chart on TradingView

Implement the Williams Alligator TradingView integration by following these steps:

Accessing the Indicators Menu

Click the ‘Indicators’ button at the top of the TradingView chart to open a menu containing a wide selection of technical indicators and tools.

Searching for the Williams Alligator Indicator

Type “Williams Alligator” in the search bar of the indicators menu and select the indicator from the list of results. The indicator will be automatically added to your chart.

Customizing the Indicator Settings

After adding the Williams Alligator indicator to your chart, you can customize its settings to suit your preferences:

  1. Jaw, Teeth, and Lips Periods: By default, the Jaw uses a 13-period smoothed moving average, the Teeth uses an 8-period smoothed moving average, and the Lips uses a 5-period smoothed moving average. Adjust these values in the indicator settings menu as needed.
  2. Line Colors and Styles: Modify the appearance of the Jaw, Teeth, and Lips lines by changing their colors, thickness, and styles in the settings menu.

Understanding the Williams Alligator Indicator Components

The Williams Alligator indicator comprises three key components, representing different timeframes:

The Jaw (Blue Line)

The Jaw, represented by a blue line, is the longest smoothed moving average, typically set at 13 periods. It reflects the Alligator’s “long-term” trend and is considered the slowest moving average.

The Teeth (Red Line)

The Teeth, depicted as a red line, is the middle smoothed moving average, typically set at 8 periods. It represents the Alligator’s “mid-term” trend and is considered the intermediate moving average.

The Lips (Green Line)

The Lips, represented by a green line, is the shortest smoothed moving average, typically set at 5 periods. It reflects the Alligator’s “short-term” trend and is considered the fastest moving average.

Alligator’s Sleeping and Waking Phases

The Alligator indicator has two distinct phases: sleeping and waking. When the Jaw, Teeth, and Lips are intertwined, the Alligator is “sleeping,” indicating a range-bound market with no clear trend. When the lines start to separate and move in the same direction, the Alligator is “waking,” suggesting the beginning of a new trend.

Implementing the Williams Alligator Indicator Strategy on TradingView

To use the Williams Alligator TradingView strategy effectively, follow these steps:

Identifying Buy and Sell Signals

Buy signals occur when the Lips (green line) cross above both the Teeth (red line) and Jaw (blue line), suggesting an emerging uptrend. Conversely, sell signals arise when the Lips cross below both the Teeth and Jaw, indicating a potential downtrend.

Confirming Signals with Price Action and Candlestick Patterns

To increase the reliability of the signals generated by the Williams Alligator TradingView strategy, confirm them with price action analysis and candlestick patterns. For instance, look for bullish reversal patterns, such as hammer or morning star formations, to validate a buy signal. Similarly, confirm sell signals with bearish reversal patterns, such as shooting stars or evening stars.

Managing Risk with Stop-Loss and Take-Profit Levels

Set stop-loss orders to protect your capital and take-profit orders to lock in gains. A common approach is to place stop-loss orders below the most recent swing low for buy signals and above the most recent swing high for sell signals.

williams alligator tradingview

Combining the Williams Alligator Indicator with Other TradingView Tools

Enhance the Williams Alligator TradingView strategy by incorporating other technical analysis tools available on the platform:

  1. Williams %R Indicator: Use the Williams %R indicator to identify overbought and oversold conditions, further confirming buy and sell signals generated by the Alligator.
  2. Fractals: Fractals can help identify potential support and resistance levels, adding another layer of confirmation to your trading signals.
  3. Moving Averages: Combine the Alligator indicator with other moving averages, such as the simple moving average (SMA) or exponential moving average (EMA), to filter out false signals and confirm the overall market direction.
  4. RSI and Stochastic Oscillator: The RSI and Stochastic Oscillator can help identify overbought and oversold conditions, complementing the Williams Alligator strategy.

Setting Alerts and Notifications for the Williams Alligator Indicator on TradingView

Stay informed about potential trading opportunities by setting up alerts and notifications for the Williams Alligator TradingView strategy.

Creating Alerts for Crossover Signals

Click the ‘Alerts’ button at the top right corner of the TradingView interface. In the ‘Condition’ dropdown menu, create custom conditions for the Alligator indicator, such as the Lips crossing above or below the Teeth and Jaw. Then, choose the alert frequency and expiration date.

Customizing Alert Settings

Customize your alerts by selecting the type of notification you’d like to receive (e.g., email, SMS, or pop-up) and adding a custom message to remind you of the specific trading conditions.

Managing Your Alerts

To view, edit, or delete your alerts, go to the ‘Alerts’ tab on the right side of the TradingView interface.

Analyzing Trade Performance with the Williams Alligator Indicator on TradingView

Use TradingView’s performance tools to evaluate your trading effectiveness with the Williams Alligator TradingView strategy.

Using the TradingView Trade Performance Tool

The TradingView trade performance tool allows you to analyze your trades based on various metrics, such as win rate, average profit, and risk-reward ratio. Access this tool by clicking on the ‘Trading Panel’ at the bottom of the chart and selecting ‘Performance Summary.’

Reviewing Trades Based on Williams Alligator Indicator Signals

Examine your trades specifically based on the Williams Alligator TradingView signals to identify areas for improvement and refine your trading strategy.

Identifying Areas for Improvement

Use insights gained from trade performance analysis to adjust your trading approach, risk management strategies, and overall trading plan. Continually strive to improve your trading results by learning from both successful and unsuccessful trades.

Tips for Using the Williams Alligator Indicator on TradingView

Maximize the effectiveness of the Williams Alligator TradingView strategy by leveraging the platform’s various features:

  1. Leveraging TradingView’s Social Features: TradingView’s community allows traders to share ideas, strategies, and charts. Use these social features to gain new insights, ask questions, and learn from other traders who use the Williams Alligator indicator.
  2. Saving Chart Layouts for Future Use: Save your chart layout, including the Williams Alligator indicator and other tools you’ve applied, to quickly access your preferred setup for future trading sessions.
  3. Continuously Updating and Refining Your Trading Strategy: Stay up-to-date with market developments and continuously refine your Williams Alligator TradingView strategy to improve your trading performance.
williams alligator tradingview

Conclusion

The Williams Alligator indicator is an invaluable tool for identifying trends and potential reversals in the market. When integrated with the versatile TradingView platform, the Williams Alligator TradingView strategy becomes an even more powerful resource for traders to make informed decisions.

Always remember that consistency, discipline, and a commitment to continuous learning are crucial for success in trading. By following your trading plan, analyzing your performance, and adapting your strategy based on your experiences, you can maximize your potential for success in the financial markets.

Enhance Your Trading Analysis with the Williams %R Indicator TradingView

Williams %R indicator TradingView

Introduction

TradingView is a popular and powerful web-based charting and trading platform that offers traders access to a wide range of technical analysis tools. One such tool is the Williams %R indicator, a momentum oscillator that helps traders identify overbought and oversold conditions. In this article, we’ll explore how to use the Williams %R indicator TradingView integration effectively to enhance your trading analysis and decision-making.

Getting Started with TradingView

Before diving into the Williams %R indicator, it’s essential to understand how to navigate the TradingView platform.

Creating an Account

To get started with TradingView, visit their website and sign up for a free account. You can also choose a paid subscription plan for additional features and benefits, such as more indicators, real-time data, and enhanced customer support.

Exploring the TradingView Interface

Once you’ve created your account, familiarize yourself with the TradingView interface. Key components include the chart area, drawing tools, time frame selection, and watchlist panel.

Selecting a Chart Type and Time Frame

TradingView offers various chart types, including candlestick, bar, and line charts. Choose the chart type that you prefer and select the appropriate time frame for your trading strategy, ranging from minutes to months.

Adding the Williams %R Indicator to Your Chart on TradingView

To implement the Williams %R indicator TradingView integration, follow these simple steps:

Accessing the Indicators Menu

On the TradingView chart, click the ‘Indicators’ button at the top of the screen. This will open a menu containing a vast selection of technical indicators and tools.

Searching for Williams %R Indicator

In the search bar of the indicators menu, type “Williams %R” and select the indicator from the list of results. The indicator will be automatically added to your chart.

Customizing the Indicator Settings

After adding the Williams %R indicator to your chart, you can customize its settings to suit your preferences.

  1. Lookback Period: By default, the Williams %R indicator uses a 14-period lookback. To modify this value, click on the indicator’s settings icon and adjust the ‘Length’ parameter.
  2. Overbought and Oversold Levels: The standard overbought and oversold levels for the Williams %R indicator are -20 and -80, respectively. You can customize these levels in the settings menu under ‘Upper Line’ and ‘Lower Line’.
  3. Line Color and Style: Change the appearance of the indicator line by adjusting its color, thickness, and style in the settings menu under ‘Line’.

Implementing the Williams %R Indicator Strategy on TradingView

With the Williams %R indicator TradingView integration set up, it’s time to implement the strategy effectively.

Identifying Buy and Sell Signals

The basic Williams %R indicator strategy involves looking for buy and sell signals based on overbought and oversold conditions. A buy signal occurs when the indicator moves below the oversold level and then crosses back above it. Conversely, a sell signal occurs when the indicator moves above the overbought level and then crosses back below it.

Using Advanced Techniques

To improve the effectiveness of the Williams %R indicator TradingView strategy, consider incorporating advanced techniques:

  1. Divergence: Divergence occurs when the price and the Williams %R indicator move in opposite directions. Bullish divergence (price making lower lows and the indicator forming higher lows) suggests a potential trend reversal to the upside. Bearish divergence (price making higher highs and the indicator forming lower highs) indicates a potential trend reversal to the downside.
  2. Support and Resistance Levels: Combine the Williams %R indicator with support and resistance levels to confirm trend strength or identify potential reversal points. When the indicator bounces off an oversold level near significant support, it may signal a bullish trend. Similarly, when the indicator declines from an overbought level near critical resistance, it may suggest a bearish trend. 3. Trend-Following Methods: Enhance the Williams %R indicator TradingView strategy by incorporating trend-following techniques. For instance, use moving averages to identify the overall market direction and take trades in line with the prevailing trend.

Combining the Williams %R Indicator with Other TradingView Tools

To further improve the reliability of the Williams %R indicator TradingView strategy, consider combining it with other technical analysis tools available on the platform:

  1. Moving Averages: Use moving averages to filter out false signals and confirm the overall market direction.
  2. RSI and Stochastic Oscillator: Combine the Williams %R indicator with the RSI or Stochastic Oscillator for additional confirmation of overbought and oversold conditions.
  3. Bollinger Bands: Bollinger Bands can help identify potential reversal points when used in conjunction with the Williams %R indicator.
  4. Drawing Tools: Utilize TradingView’s drawing tools, such as trendlines and Fibonacci retracements, to complement the Williams %R indicator strategy.
Williams %R indicator TradingView

Setting Alerts and Notifications for Williams %R Indicator on TradingView

Stay informed about potential trading opportunities by setting up alerts and notifications for the Williams %R indicator TradingView strategy.

Creating an Alert for Overbought and Oversold Conditions

To create an alert, click the ‘Alerts’ button at the top right corner of the TradingView interface. In the ‘Condition’ dropdown menu, select the Williams %R indicator and specify the overbought or oversold level. Then, choose the alert frequency and expiration date.

Customizing Alert Settings

You can customize your alerts by selecting the type of notification you’d like to receive (e.g., email, SMS, or pop-up) and adding a custom message to remind you of the specific trading conditions.

Managing Your Alerts

To view, edit, or delete your alerts, go to the ‘Alerts’ tab on the right side of the TradingView interface.

Analyzing Trade Performance with the Williams %R Indicator on TradingView

Track your trading performance using the Williams %R indicator with TradingView’s trade performance tools.

Using the TradingView Trade Performance Tool

TradingView’s trade performance tool allows you to analyze your trades based on various metrics, such as win rate, average profit, and risk-reward ratio. Access this tool by clicking on the ‘Trading Panel’ at the bottom of the chart and selecting ‘Performance Summary.’

Reviewing Trades Based on Williams %R Indicator Signals

Analyze your trades specifically based on the Williams %R indicator TradingView signals to identify areas for improvement and refine your trading strategy.

Identifying Areas for Improvement

Use the insights gained from the trade performance analysis to adjust your trading approach, risk management, and position sizing.

Tips for Using the Williams %R Indicator on TradingView

Maximize the effectiveness of the Williams %R indicator TradingView strategy with these tips:

  1. Leveraging TradingView’s Social Features: Take advantage of TradingView’s social features, such as idea sharing, chat rooms, and following other traders, to learn and gain insights from the community.
  2. Saving Chart Layouts for Future Use: Save your customized chart layouts, including the Williams %R indicator settings, for quick access in future trading sessions.
  3. Continuously Updating and Refining Your Trading Strategy: Stay informed about market news and developments and continuously update and refine your Williams %R indicator TradingView strategy to stay ahead of the curve and improve your trading performance.
    Williams %R indicator TradingView
    Williams %R indicator TradingView

    Conclusion

    The Williams %R indicator is a powerful tool for identifying overbought and oversold conditions in the market. By integrating the indicator with the TradingView platform, you can access a wide range of additional tools and features to enhance your trading analysis and decision-making.

    Remember, consistency and discipline are critical when using the Williams %R indicator TradingView strategy. By following your trading plan, continuously learning from your experiences, and staying up-to-date with market developments, you can maximize your potential for success in the financial markets.

Master the Williams %R Indicator Strategy for Profitable Trading Decisions

Williams %R indicator strategy

Introduction

Technical analysis is an essential tool for traders, as it helps them determine potential entry and exit points in the market. One of the popular tools in technical analysis is the Williams %R indicator. This article will discuss the Williams %R indicator strategy and provide an in-depth understanding of how to use it effectively to improve your trading decisions.

Understanding Williams %R Indicator

Created by Larry Williams, a renowned trader and author, the Williams %R indicator is a momentum oscillator that gauges overbought and oversold conditions in the market. It’s essential to understand the indicator’s mechanics and interpretation to execute the Williams %R indicator strategy effectively.

Formula and Calculation

The Williams %R indicator is calculated using the following formula:

Williams %R = (Highest High – Close) / (Highest High – Lowest Low) * -100

Where:

  • Highest High refers to the highest price over the lookback period.
  • Close is the current closing price.
  • Lowest Low is the lowest price over the lookback period.

Overbought and Oversold Levels

The Williams %R indicator oscillates between 0 and -100, with -20 and -80 acting as overbought and oversold levels, respectively. When the indicator rises above -20, it signifies an overbought condition, and when it falls below -80, it indicates an oversold condition.

Interpreting the Indicator

A primary purpose of the Williams %R indicator is to identify potential trend reversals. When the indicator moves from overbought to oversold levels or vice versa, it suggests a possible change in the market direction.

Setting Up the Williams %R Indicator

To execute the Williams %R indicator strategy successfully, it’s crucial to set up the indicator correctly.

Selecting a Time Frame

The Williams %R indicator can be applied to various time frames, such as daily, hourly, or even minute charts. Choose a time frame that aligns with your trading style and preferences.

Choosing the Lookback Period

The default lookback period for the Williams %R indicator is 14 periods. However, traders can adjust this to suit their trading style. A shorter lookback period will make the indicator more sensitive to price changes, while a longer lookback period will smooth out the oscillator, potentially reducing false signals.

Adjusting Overbought and Oversold Levels

While the standard overbought and oversold levels are -20 and -80, traders can customize these levels for a more tailored approach. For instance, using -10 and -90 levels may help identify more extreme conditions and potentially reduce false signals.

Applying the Indicator on a Trading Platform

Most trading platforms, such as MetaTrader 4, TradingView, or ThinkorSwim, offer the Williams %R indicator in their technical analysis tools. To apply the indicator, search for “Williams %R” in your platform’s indicators list and add it to your chart.

Williams %R Indicator Strategy

The Williams %R indicator strategy involves both basic and advanced techniques to capitalize on potential trading opportunities.

Basic Strategy

  1. Buy Signals: A buy signal occurs when the Williams %R indicator moves below the oversold level and then crosses back above it. This suggests that the market is turning bullish and presents a potential buying opportunity.
  2. Sell Signals: A sell signal occurs when the Williams %R indicator moves above the overbought level and then crosses back below it. This indicates that the market is turning bearish and presents a potential selling opportunity.

Advanced Strategy

  1. Divergence: Divergence occurs when the price and the Williams %R indicator move in opposite directions. For instance, if the price makes higher highs while the indicator forms lower highs, it’s called bearish divergence, signaling a potential trend reversal. Conversely, if the price makes lower lows while the indicator forms higher lows, it’s called bullish divergence, indicating a possible uptrend.
  1. Support and Resistance Levels: The Williams %R indicator can be used in conjunction with support and resistance levels to confirm the strength of a trend or to identify potential reversal points. When the indicator bounces off an oversold level near a significant support zone, it may signal a strong bullish trend. Similarly, when the indicator declines from an overbought level near a critical resistance zone, it may suggest a strong bearish trend.
  2. Trend-Following Techniques: The Williams %R indicator strategy can be improved by incorporating trend-following techniques. For instance, traders can use moving averages to identify the overall market direction and only take trades in line with the prevailing trend.

Combining with Other Indicators

  1. Moving Averages: Combining the Williams %R indicator with moving averages can help filter out false signals and improve the overall effectiveness of the strategy. For example, only consider buy signals when the price is above a moving average and sell signals when the price is below it.
  2. Relative Strength Index (RSI): The RSI is another popular momentum oscillator that measures the speed and change of price movements. Combining the RSI with the Williams %R indicator can provide additional confirmation of overbought and oversold conditions, increasing the strategy’s reliability.
  3. Stochastic Oscillator: Like the Williams %R indicator, the Stochastic Oscillator identifies overbought and oversold levels. Using both indicators in conjunction can help validate signals and reduce the likelihood of false entries.
  4. Bollinger Bands: Bollinger Bands measure price volatility and can help identify potential reversal points. When the Williams %R indicator signals an overbought or oversold condition in conjunction with a price touching the upper or lower Bollinger Band, it may offer a more reliable trading signal.
Williams %R indicator strategy

Risk Management and Position Sizing

Implementing proper risk management and position sizing is essential when executing the Williams %R indicator strategy.

Importance of Risk Management

Risk management helps protect your trading capital and ensures long-term success in the markets. Without proper risk management, even the most effective trading strategies can lead to significant losses.

Stop-Loss Placement

When using the Williams %R indicator strategy, it’s crucial to place stop-loss orders to limit potential losses. For buy signals, place a stop-loss below the recent swing low, and for sell signals, place it above the recent swing high.

Position Sizing

Determine your position size based on your risk tolerance and the size of your trading account. A common rule of thumb is to risk no more than 1-2% of your account on any single trade.

Take-Profit Levels

Setting take-profit levels helps lock in profits and ensures a favorable risk-reward ratio. Traders can use a predetermined risk-reward ratio, such as 1:2 or 1:3, or use technical tools like support and resistance levels or trailing stop-loss orders to secure profits.

Limitations and Drawbacks of Williams %R Indicator

As with any technical indicator, the Williams %R indicator has its limitations and drawbacks.

False Signals and Whipsaws

The Williams %R indicator can generate false signals and whipsaws, especially in choppy or sideways markets. Combining the indicator with other technical tools can help mitigate this issue.

Lagging Nature of the Indicator

The Williams %R indicator is a lagging indicator, which means it is based on past price data and may not accurately predict future price movements. Traders should consider this limitation and use the indicator in conjunction with other technical analysis tools for better decision-making.

Inability to Predict Future Price Movements

While the Williams %R indicator can help identify potential trend reversals and overbought/oversold conditions, it cannot predict the exact future price movements. Relying solely on the Williams %R indicator strategy may lead to missed opportunities or unexpected losses.

Tips for Using the Williams %R Indicator

To make the most of the Williams %R indicator strategy, consider these helpful tips:

  1. Practicing with a Demo Account: Before using the strategy with real money, practice on a demo account to familiarize yourself with the indicator and refine your trading skills.
  2. Adapting the Strategy to Your Trading Style: Customize the Williams %R indicator settings and the overall strategy to suit your trading style, risk tolerance, and objectives.
  3. Keeping a Trading Journal: Document your trades, including your entries, exits, stop-loss and take-profit levels, and any observations about the market. Review your journal periodically to identify areas for improvement and learn from your mistakes.
  4. Continual Learning and Improvement: Stay informed about market news, study other technical indicators, and continually refine your Williams %R indicator strategy to improve your trading performance.
Williams %R indicator strategy

Conclusion

The Williams %R indicator strategy offers a practical approach to identifying potential trend reversals and overbought/oversold conditions in the market. By combining the Williams %R indicator with other technical analysis tools and implementing proper risk management, traders can enhance their decision-making and increase their chances of success.

Remember, consistency and discipline are crucial when using the Williams %R indicator strategy. By adhering to your trading plan and continually learning from your experiences, you can maximize your potential in the financial markets.

Master Quasimodo (QML) Indicator MT5: Unleash Trading Potential with This Comprehensive Guide

Quasimodo (QML) Indicator MT5

Introduction

The world of trading is continuously evolving, and traders are always on the lookout for new tools and techniques to improve their performance. One such innovation is the Quasimodo (QML) Indicator MT5, a powerful custom indicator designed to enhance your trading experience. In this comprehensive guide, we will explore the QML Indicator’s features, installation, trading strategies, advantages, and limitations, helping you harness its potential to achieve better trading results.

Understanding Quasimodo (QML) Indicators

Quasimodo (QML) Indicators are a type of custom indicator designed for the MetaTrader 5 (MT5) platform. QML, or Qt Meta-Object Language, is a powerful programming language that enables developers to create dynamic and interactive indicators with greater flexibility and ease. Some popular Quasimodo (QML) Indicators for MT5 include overbought/oversold, trend reversal, and support/resistance level indicators.

Setting Up Quasimodo (QML) Indicators on MT5

Installing Quasimodo (QML) Indicators on MT5 is a simple process that involves downloading the indicator file, placing it in the appropriate folder, and customizing the settings within the platform.

  1. Download the Quasimodo (QML) Indicator file (usually in .qml format) from a reputable source.
  2. Open the MT5 platform and navigate to the “File” menu, then select “Open Data Folder.”
  3. Locate the “MQL5” folder and open the “Indicators” subfolder. Place the downloaded QML Indicator file in this folder.
  4. Restart the MT5 platform to ensure the Quasimodo (QML) Indicator appears in the “Navigator” window under “Custom Indicators.”
  5. Drag and drop the indicator onto the desired chart, and customize the settings and parameters as needed.

Developing Your Own Quasimodo (QML) Indicator for MT5

If you have programming experience and want to create a custom Quasimodo (QML) Indicator for MT5, you can use the Qt Creator software and QML programming language to design a unique and effective indicator tailored to your trading strategy.

  1. Download and install Qt Creator, a cross-platform integrated development environment (IDE) for creating QML applications.
  2. Familiarize yourself with the basic structure and syntax of QML programming, including components, properties, signals, and slots.
  3. Design the layout and functionality of your Quasimodo (QML) Indicator, taking into account the requirements of your specific trading strategy.

Trading Strategies with Quasimodo (QML) Indicators on MT5

Quasimodo (QML) Indicators can be used to develop various trading strategies, such as trend-following, reversal, or breakout strategies. Combining the Quasimodo (QML) Indicator with other technical analysis tools can enhance the reliability of your trading signals and improve your overall performance.

  1. Trend-following strategies: Use the Quasimodo (QML) Indicator to identify the direction of the prevailing trend and enter trades in the direction of the trend. Combine the Quasimodo (QML) Indicator with moving averages or trendlines for added confirmation.
  2. Reversal strategies: Look for potential trend reversal points using the Quasimodo (QML) Indicator. Combine the indicator with support and resistance levels or oscillators, such as RSI or Stochastic, to increase the accuracy of your reversal signals.
  3. Breakout strategies: Use the Quasimodo (QML) Indicator to identify potential breakout points when price moves beyond a predetermined level or range. Combine the indicator with other tools like Bollinger Bands or the Average True Range (ATR) to enhance the effectiveness of your breakout strategy.
Quasimodo (QML) Indicator MT5

Advantages and Limitations of Quasimodo (QML) Indicators on MT5

Quasimodo (QML) Indicators offer several benefits, including flexibility, enhanced user experience, and compatibility with the powerful MT5 platform. However, they also have some drawbacks, such as the need for programming knowledge, limited community support, and potential for coding errors.

Benefits:

  1. Flexibility in creating custom indicators: QML allows for greater customization and control over the design and functionality of your indicators.
  2. Enhanced user experience with dynamic and interactive elements: QML enables you to create visually appealing and interactive indicators that can improve your trading experience.
  3. Compatibility with the powerful MT5 platform: Quasimodo (QML) Indicators can be seamlessly integrated with the robust features and tools available on the MT5 platform.

Drawbacks:

  1. Requires programming knowledge: To develop your custom Quasimodo (QML) Indicator, you’ll need a basic understanding of QML programming.
  2. Limited community support: QML Indicators may not have as much community support as standard MQL5 indicators, making it more challenging to find resources and troubleshoot issues.
  3. Potential for coding errors and performance issues: Like any custom indicator, Quasimodo (QML) Indicators are susceptible to coding errors and performance issues, which can impact your trading results.

Tips for Successful Trading with Quasimodo (QML) Indicator MT5

To maximize your success when trading with Quasimodo (QML) Indicators on MT5, consider the following tips:

  1. Ensure proper Quasimodo (QML) Indicator functionality: Before using a custom QML Indicator in your live trading, thoroughly test its functionality on a demo account to ensure it works as intended.
  2. Backtest and optimize Quasimodo (QML) Indicator-based strategies: Conduct extensive backtesting of your QML Indicator strategies to assess their effectiveness and make any necessary adjustments to optimize performance.
  3. Balance risk and reward: Maintain a healthy risk-reward ratio and use stop-loss and take-profit orders to protect your trades and lock in profits.
  4. Develop a consistent trading plan and maintain discipline: Create a comprehensive trading plan outlining your entry and exit criteria, risk management approach, and overall strategy. Stick to your plan and remain disciplined to increase your chances of long-term success.

Real-life Examples and Case Studies

To better understand the practical application of Quasimodo (QML) Indicators on MT5, let’s explore some real-life examples and case studies:

  1. Successful trades using Quasimodo (QML) Indicators on MT5: A trader identifies a bullish trend using a custom QML trend-following indicator and enters a long position on a forex pair. The trader sets a stop-loss order at a recent support level and a take-profit order based on their desired risk-reward ratio. The trade ultimately reaches its take-profit level, yielding a profitable outcome.
  2. Learning from challenges and trading mistakes: A trader encounters a series of false signals from their custom Quasimodo (QML) Indicator, resulting in consecutive losing trades. Analyzing their performance, the trader realizes the need for additional confirmation tools, such as moving averages or chart patterns, to improve the reliability of their QML-based strategy.
  3. Adapting Quasimodo (QML) Indicator strategies to various market conditions: A trader notices that their QML breakout strategy performs well during periods of high volatility but struggles during low-volatility conditions. To adapt to these different market environments, the trader adjusts their strategy by incorporating other indicators, such as the Average True Range (ATR), to help identify periods of high and low volatility and adjust their trading approach accordingly.
Quasimodo (QML) Indicator MT5

Conclusion

The Quasimodo (QML) Indicator for MT5 offers traders a powerful and flexible tool to enhance their trading experience and performance. By understanding the intricacies of QML programming, setting up and customizing your Quasimodo (QML) Indicators, developing effective trading strategies, and being mindful of the advantages and limitations of these custom indicators, you can harness their potential to achieve better trading results.

As you continue to explore the world of Quasimodo (QML) Indicators on MT5, remember the importance of continuous learning, practice, and discipline. By developing a consistent trading plan and adapting to changing market conditions, you can increase your chances of success and develop a unique trading approach tailored to your needs and goals.

Master the Aroon Indicator TradingView: Your Ultimate Guide to Enhancing Trading Performance

aroon indicator tradingview

Introduction

Navigating the world of trading can be challenging, especially when it comes to identifying trends and reversals. The Aroon Indicator is a powerful technical analysis tool designed to help traders identify these crucial elements, and the TradingView platform offers an excellent environment to harness its potential. In this comprehensive guide, we will explore the Aroon Indicator TradingView, discussing its features, application, trading strategies, advantages, and limitations.

Understanding the Aroon Indicator

Before diving into the Aroon Indicator TradingView, it’s essential to understand what the Aroon Indicator is and how it works. Developed by Tushar Chande in 1995, the Aroon Indicator is designed to identify the start of a new trend, trend strength, and potential trend reversals.

The Aroon Indicator consists of two separate lines: Aroon Up and Aroon Down. The formula for calculating these components is based on the number of periods since the highest high (Aroon Up) and the lowest low (Aroon Down) within a specified time frame. The values of the Aroon Up and Down lines range between 0 and 100.

Setting Up the Aroon Indicator on TradingView

Adding the Aroon Indicator to your charts on TradingView is simple. Follow these steps to set up the Aroon Indicator TradingView:

  1. Open the TradingView platform and select a chart for your chosen market.
  2. Click on the “Indicators” button at the top of the screen.
  3. Type “Aroon” in the search bar and select the “Aroon” indicator from the results.
  4. The Aroon Indicator will now appear on your chart, with the Aroon Up line in green and the Aroon Down line in red.

You can also customize the Aroon Indicator settings, such as the time period and line colors, by clicking on the gear icon next to the indicator’s name in the chart’s upper left corner.

Trading Strategies Using the Aroon Indicator on TradingView

The Aroon Indicator TradingView can be used to develop various trading strategies. Here are three common approaches:

  1. Trend identification with the Aroon Indicator: When the Aroon Up line is above the Aroon Down line, and both lines are rising, it indicates a strong upward trend. Conversely, when the Aroon Down line is above the Aroon Up line and both lines are falling, it suggests a strong downward trend.
  2. Identifying trend reversals and consolidations: When the Aroon Up and Aroon Down lines cross each other, it can signal a potential trend reversal. If both lines are moving sideways or remaining close together, it may indicate a period of consolidation or a weak trend.
  3. Combining the Aroon Indicator with other technical analysis tools: To increase the accuracy of your trading signals, you can combine the Aroon Indicator with other technical analysis tools, such as moving averages, the Relative Strength Index (RSI), or Bollinger Bands.

Tips for Effective Aroon Indicator Trading  TradingView

To maximize your success when trading with the Aroon Indicator TradingView, consider the following tips:

  1. Selecting the appropriate time frame: The effectiveness of the Aroon Indicator can vary depending on the time frame you choose. Experiment with different time frames to find the one that best suits your trading style and strategy.
  2. Managing risk and position sizing: Always maintain a healthy risk-reward ratio and use stop-loss orders to protect your trades. Adjust your position size according to your risk tolerance and the volatility of the market.
  3. Developing a consistent trading plan: Create a comprehensive trading plan that outlines your entry and exit criteria, risk management approach, and overall strategy. Stick to your plan and remain disciplined to increase your chances of long-term success.
  1. Adapting to different market conditions: Recognize that the effectiveness of the Aroon Indicator TradingView may vary in different market conditions. Be prepared to adjust your strategy as needed to account for changing trends and volatility.

Real-life Examples and Case Studies

To better understand the practical application of the Aroon Indicator TradingView, let’s explore some real-life examples and case studies:

  1. Successful trades using the Aroon Indicator on TradingView: A trader identifies a bullish trend using the Aroon Indicator and enters a long position on a stock. The trader sets a stop-loss order at a recent support level and a take-profit order based on their desired risk-reward ratio. The trade ultimately reaches its take-profit level, yielding a profitable outcome.
  2. Learning from challenges and trading mistakes: A trader encounters a series of false signals from the Aroon Indicator, resulting in consecutive losing trades. Analyzing their performance, the trader realizes the need for additional confirmation tools, such as moving averages or chart patterns, to improve the reliability of their Aroon-based strategy.
  3. Adapting Aroon Indicator strategies to various assets and market conditions: A trader notices that their Aroon-based strategy performs well in trending markets but struggles during periods of consolidation. To adapt to these different market environments, the trader adjusts their strategy by incorporating other indicators, such as the Average True Range (ATR), to help identify periods of consolidation and adjust their trading approach accordingly.
aroon indicator tradingview

Advantages and Limitations of the Aroon Indicator TradingView

The Aroon Indicator TradingView offers several benefits, but it also comes with some drawbacks. It’s essential to be aware of these advantages and limitations when using the Aroon Indicator in your trading.

Benefits:

  1. Easy to interpret and understand: The Aroon Indicator’s simple visual representation makes it easy for traders to identify trends and potential reversals.
  2. Effective in identifying trends and reversals: The Aroon Indicator can help traders spot the beginning of new trends, determine trend strength, and anticipate potential trend reversals.
  3. Compatibility with the TradingView platform: The Aroon Indicator can be seamlessly integrated with the robust features and tools available on the TradingView platform.

Drawbacks:

  1. Lagging nature of the indicator: The Aroon Indicator is a lagging indicator, meaning that it may not always provide timely signals for entering or exiting trades.
  2. False signals during periods of sideways movement: During periods of consolidation or sideways movement, the Aroon Indicator may generate false signals, which can lead to losses if not properly managed.
  3. Limited effectiveness in isolation: While the Aroon Indicator can provide valuable insights, it is often more effective when combined with other technical analysis tools to confirm signals and enhance trading strategies.

Enhancing Your Trading Skills with the Aroon Indicator TradingView

As you continue to explore the world of Aroon Indicator TradingView, remember the importance of continuous learning, practice, and discipline. By developing a consistent trading plan and adapting to changing market conditions, you can increase your chances of success and develop a unique trading approach tailored to your needs and goals.

In addition to mastering the Aroon Indicator, take advantage of the vast resources available on the TradingView platform, such as webinars, forums, and educational articles, to further enhance your trading skills and knowledge.

aroon indicator tradingview

Conclusion

The Aroon Indicator TradingView offers traders a powerful and flexible tool to enhance their trading experience and performance. By understanding the intricacies of the Aroon Indicator, setting up and customizing your Aroon Indicator on TradingView, developing effective trading strategies, and being mindful of the advantages and limitations of this technical analysis tool, you can harness its potential to achieve better trading results.

As you continue to explore the world of the Aroon Indicator on TradingView, remember the importance of continuous learning, practice, and discipline. By developing a consistent trading plan and adapting to changing market conditions, you can increase your chances of success and develop a unique trading approach tailored to your needs and goals. Embrace the power of the Aroon Indicator TradingView and elevate your trading skills to new heights.

Master the ARC Indicator MT5: Comprehensive Guide to Boost Your Trading Success

ARC Indicator MT5
ARC Indicator MT5
ARC Indicator MT5

Introduction

Technical indicators play a crucial role in modern trading strategies, helping traders make informed decisions based on historical price data and mathematical calculations. One such powerful tool is the ARC Indicator MT5, designed to assist traders in identifying market trends and potential reversal points. In this comprehensive guide, we’ll explore the ARC Indicator and its application on the MetaTrader 5 (MT5) platform, revealing how you can leverage this unique tool to improve your trading performance.

Understanding the ARC Indicator

Before diving into how to utilize the ARC Indicator MT5 effectively, let’s first understand its origin, concept, and the underlying calculations.

Concept and Origin

The ARC Indicator, short for the Adaptive Reactive Cycles Indicator, was developed to identify market trends and cycles while adapting to changing market conditions. Unlike traditional indicators that rely on fixed parameters, the ARC Indicator employs a dynamic approach to better reflect the evolving nature of financial markets.

Formula and Calculations

At its core, the ARC Indicator consists of a series of calculations involving price data, moving averages, and other technical indicators. These calculations result in the ARC curve, which oscillates above and below a central zero line. The curve’s movement and its interaction with the zero line provide valuable insights into the market’s trend direction and strength.

Components of the ARC Indicator

The ARC Indicator comprises three main components:

  1. The ARC curve: The primary visual representation of the indicator, reflecting the market’s trend direction and strength.
  2. The zero line: A central reference point that the ARC curve oscillates around, providing buy and sell signals when crossed.
  3. Signal arrows: Visual cues indicating potential entry and exit points based on the ARC curve’s movement and interactions with the zero line.

Setting Up the ARC Indicator on MT5

To start using the ARC Indicator MT5, you’ll first need to install and configure it on your MT5 platform.

Installation Process

  1. Download the ARC Indicator file (usually in .mq5 or .ex5 format) from a reputable source.
  2. Open your MT5 platform and navigate to the “File” menu, then click on “Open Data Folder.”
  3. Locate the “MQL5” folder, followed by the “Indicators” folder, and copy the downloaded ARC Indicator file into this directory.
  4. Restart your MT5 platform, and the ARC Indicator should now appear in your “Navigator” panel under “Indicators.”

Customizing Settings and Parameters

Once the ARC Indicator MT5 is installed, you can customize its settings and parameters to suit your trading style and preferences. To do this, right-click on the indicator in the “Navigator” panel and select “Properties.” Here, you can adjust settings such as the calculation period, price type, and visual aspects like colors and line thickness.

Visualizing the ARC Indicator on the Chart

After configuring the ARC Indicator MT5 to your liking, simply drag and drop it onto your desired price chart. The indicator’s curve, zero line, and signal arrows will now appear, providing valuable insights into the market’s behavior.

Trading Strategies with the ARC Indicator on MT5

The versatility of the ARC Indicator MT5 allows for various trading strategies, including trend-following, reversals, and divergence-based approaches.

ARC Crossover Strategy

The ARC Crossover Strategy involves entering and exiting trades based on the ARC curve’s interaction with the zero line.

  1. Identifying Entry and Exit Signals: When the ARC curve crosses above the zero line, it signals a potential bullish trend, and traders may consider entering a long position. Conversely, when the ARC curve crosses below the zero line, it indicates a possible bearish trend, and traders may consider entering a short position. Exit signals occur when the ARC curve crosses the zero line in the opposite direction of the initial trade.
  2. Managing Risk with Stop-Loss Orders: To protect your trades from excessive losses, use stop-loss orders at appropriate levels based on recent support and resistance levels or a predetermined risk-reward ratio.
  1. Adapting the Strategy to Different Timeframes and Instruments: The ARC Crossover Strategy can be applied to various timeframes and trading instruments, such as forex, stocks, or commodities. Experiment with different settings and timeframes to find the optimal configuration for your specific trading goals.

ARC Divergence Strategy

The ARC Divergence Strategy capitalizes on discrepancies between the ARC Indicator MT5 and the underlying price action to identify potential trend reversals.

  1. Recognizing Bullish and Bearish Divergences: Bullish divergences occur when the price forms a lower low while the ARC curve forms a higher low, signaling potential upward price movement. Bearish divergences occur when the price forms a higher high while the ARC curve forms a lower high, indicating possible downward price movement.
  2. Combining Divergences with Support and Resistance Levels: To enhance the reliability of divergence signals, confirm them with nearby support and resistance levels. If a bullish divergence occurs near a strong support level, it may increase the likelihood of a successful long trade, and vice versa for bearish divergences and resistance levels.
  3. Risk Management and Profit-Taking Considerations: As with any trading strategy, apply sound risk management techniques, such as setting appropriate stop-loss and take-profit orders, to protect your trades and lock in profits.

ARC Indicator with Other Technical Tools

The ARC Indicator MT5 can be combined with other technical analysis tools to create comprehensive and robust trading strategies.

  1. Combining ARC with Moving Averages: Use moving averages as trend filters to confirm ARC signals. For example, if the ARC curve crosses above the zero line and the price is above its moving average, it may suggest a strong bullish trend.
  2. Integrating ARC with Oscillators, such as RSI or Stochastic: Oscillators can help identify overbought or oversold conditions, adding an extra layer of confirmation to ARC signals. If the ARC curve crosses above the zero line and the RSI is below 30, it may indicate a strong buying opportunity.
  3. Using ARC alongside Chart Patterns and Trendlines: Chart patterns and trendlines can provide valuable context and help identify potential breakout or reversal points in conjunction with ARC signals.
ARC Indicator MT5
ARC Indicator MT5

Advantages and Limitations of the ARC Indicator on MT5

The ARC Indicator MT5 offers several benefits but also has its limitations.

Benefits

  1. Unique approach to trend identification and market cycles: The ARC Indicator’s adaptive nature sets it apart from traditional indicators, allowing for more accurate trend identification in changing market conditions.
  2. Versatility across various timeframes and trading instruments: The ARC Indicator can be applied to a wide range of financial instruments and timeframes, making it suitable for traders with diverse goals and preferences.
  3. Compatibility with the powerful MT5 platform: The ARC Indicator’s integration with the advanced MT5 platform enables traders to take advantage of its extensive features and resources.

Drawbacks

  1. Potential for false signals: As with any technical indicator, the ARC Indicator MT5 may generate false signals, necessitating the use of additional confirmation tools or risk management techniques.
  2. May require additional confirmation tools: To improve the accuracy of ARC signals, it is recommended to combine the indicator with other technical analysis tools, such as oscillators, moving averages, or support and resistance levels.
  3. Complexity compared to other technical indicators: The ARC Indicator’s calculations and dynamic nature may make it more complex than simpler indicators, requiring a greater learning curve for traders new to technical analysis.

Tips for Successful Trading with the ARC Indicator on MT5

To maximize your success when trading with the ARC Indicator MT5, consider the following tips:

  1. Choosing the appropriate timeframe and instrument: Experiment with different timeframes and financial instruments to find the optimal configuration for your trading style and goals.
  2. Backtesting and optimizing the ARC Indicator strategies: Conduct thorough backtesting of your ARC-based strategies to ensure their effectiveness and adjust settings as necessary to optimize performance.
  3. Balancing risk and reward: Always maintain a healthy risk-reward ratio and use stop-loss and take-profit orders to protect your trades and lock in profits.
  4. Developing a consistent trading plan and maintaining discipline: Create a comprehensive trading plan outlining your entry and exit criteria, risk management approach, and overall strategy. Stick to your plan and remain disciplined to increase your chances of long-term success.

Real-life Examples and Case Studies

To better understand the practical application of the ARC Indicator MT5, let’s explore some real-life examples and case studies.

  1. Successful trades using the ARC Indicator on MT5: A trader identifies a bullish ARC crossover signal on a forex pair’s hourly chart, accompanied by a confirmation from an RSI oscillator. After entering a long position, the trader sets a stop-loss order at a recent support level and a take-profit order based on their desired risk-reward ratio. The trade ultimately reaches its take-profit level, yielding a profitable outcome.
  2. Learning from challenges and trading mistakes: A trader encounters a series of false ARC crossover signals, resulting in consecutive losing trades. Analyzing their performance, the trader realizes the need for additional confirmation tools, such as moving averages or chart patterns, to improve the reliability of their ARC-based strategy.
  3. Adapting ARC Indicator strategies to various market conditions: A trader notices that their ARC crossover strategy performs well in trending markets but struggles during periods of consolidation. To adapt to these varying conditions, the trader incorporates other technical tools, such as Bollinger Bands or the Average Directional Index (ADX), to help filter out low-probability trades.
ARC Indicator MT5
ARC Indicator MT5

Conclusion

In summary, the ARC Indicator MT5 is a versatile and adaptive technical tool designed to assist traders in identifying market trends and potential reversal points. By understanding its principles and learning how to apply it effectively, you can develop robust trading strategies tailored to your unique goals and preferences. As with any trading tool, continuous learning and practice are crucial for achieving long-term success. So, don’t hesitate to experiment with the ARC Indicator MT5 and uncover the potential it holds for enhancing your trading performance.

Unleash the Power of Aroon Indicator Strategies for Profitable Trading Success

aroon oscillator mt4
Aroon Indicator Strategies

Introduction

Trading in financial markets requires a deep understanding of market trends and the ability to identify potential reversals. One popular technical tool that helps traders achieve this is the Aroon Indicator. In this article, we will explore various Aroon Indicator strategies to improve your trading performance and profitability. By understanding and implementing an effective aroon indicator strategy, you can enhance your trading skills and make more informed decisions.

Basics of the Aroon Indicator

Before diving into specific trading strategies, let’s first understand the basics of the Aroon Indicator and its components.

Aroon Up and Aroon Down Lines

The Aroon Indicator comprises two lines: the Aroon Up and Aroon Down lines. The Aroon Up line measures the number of periods since the highest high within a specified period, while the Aroon Down line measures the number of periods since the lowest low within the same period. Both lines oscillate between 0 and 100, with higher values indicating stronger trends.

Time Periods and Calculations

The default period for the Aroon Indicator is typically 14, although traders can adjust it to suit their trading style. The Aroon Up and Aroon Down lines are calculated using the following formulas:

Aroon Up = ( (14 – Periods since 14-day high) / 14 ) x 100 Aroon Down = ( (14 – Periods since 14-day low) / 14 ) x 100

Understanding Trend Strength and Potential Reversals

The Aroon Indicator helps traders identify the strength of a trend and potential reversals. When the Aroon Up line is above the Aroon Down line, it indicates a bullish trend. Conversely, when the Aroon Down line is above the Aroon Up line, it suggests a bearish trend. Crossovers between the two lines can signal potential trend reversals.

Aroon Indicator Trading Strategies

Now that we have a basic understanding of the Aroon Indicator, let’s explore various aroon indicator strategies that traders can employ to capitalize on market trends and reversals.

Aroon Crossover Strategy

One popular aroon indicator strategy is the Aroon Crossover Strategy. This strategy focuses on identifying trade opportunities when the Aroon Up and Aroon Down lines cross each other.

  1. Entry and Exit Signals: A buy signal occurs when the Aroon Up line crosses above the Aroon Down line, indicating bullish momentum. Conversely, a sell signal is generated when the Aroon Down line crosses above the Aroon Up line, suggesting bearish momentum. Traders can exit their positions when the lines cross again in the opposite direction.
  2. Managing Risk with Stop-Loss Orders: Implementing stop-loss orders is crucial for managing risk in this aroon indicator strategy. Traders can place stop-loss orders below the recent swing low for long positions or above the recent swing high for short positions.
  3. Optimizing the Strategy with Different Timeframes: The Aroon Crossover Strategy can be applied across various timeframes, from intraday to long-term trading. Traders should experiment with different timeframes to find the one that best suits their trading style and risk tolerance.

Aroon Divergence Strategy

Another aroon indicator strategy involves looking for divergences between the Aroon Indicator and price action. Divergences can signal potential trend reversals and provide valuable trade opportunities.

  1. Identifying Bullish and Bearish Divergences: A bullish divergence occurs when the price forms a lower low, but the Aroon Down line forms a higher low, suggesting a potential reversal to the upside. A bearish divergence happens when the price forms a higher high, but the Aroon Up line forms a lower high, indicating a possible reversal to the downside.
  1. Combining Divergences with Support and Resistance Levels: To increase the reliability of this aroon indicator strategy, traders can combine divergences with support and resistance levels. For instance, if a bullish divergence occurs near a support level, it can strengthen the buy signal.
  2. Managing Risk and Reward: As with any trading strategy, it’s essential to manage risk and reward when trading on divergences. Traders should use stop-loss orders and take-profit targets based on the specific market conditions, historical price movements, and their risk tolerance.

Aroon Trend-Following Strategy

The Aroon Trend-Following Strategy is another aroon indicator strategy that involves combining the Aroon Indicator with other trend-following indicators to identify and capitalize on strong market trends.

  1. Combining the Aroon Indicator with Trend-Following Indicators: Traders can use additional trend-following indicators, such as moving averages or the ADX (Average Directional Index), to confirm the Aroon Indicator’s signals and enhance the strategy’s reliability.
  2. Identifying Trade Opportunities: When both the Aroon Indicator and the chosen trend-following indicator signal a strong trend, traders can enter long or short positions accordingly. For instance, if the Aroon Up line is above the Aroon Down line and the price is above a moving average, it can indicate a strong bullish trend, providing an opportunity for a long trade.
  3. Managing Risk with Trailing Stop-Loss Orders: To protect profits and minimize losses in this aroon indicator strategy, traders can use trailing stop-loss orders. These orders automatically move with the market, allowing traders to lock in profits while still giving the trade room to run.
aroon indicator strategy

Enhancing Aroon Indicator Strategies with Additional Technical Tools

To further improve the performance of an aroon indicator strategy, traders can incorporate additional technical tools into their analysis. Some popular tools that complement the Aroon Indicator include:

A. Moving Averages

Moving averages, such as simple or exponential moving averages, can help confirm the overall market trend and increase the reliability of the Aroon Indicator’s signals.

B. Relative Strength Index (RSI)

The RSI is a momentum oscillator that measures the speed and change of price movements. It can provide additional confirmation of overbought or oversold conditions and potential trend reversals.

C. Fibonacci Retracements

Fibonacci retracements are a popular technical tool used to identify potential support and resistance levels. Combining these levels with the Aroon Indicator can help traders anticipate price movements and enhance their trading strategy.

D. Support and Resistance Levels

Identifying support and resistance levels using tools like trendlines, pivot points, or psychological levels can help traders better understand the market context and make more informed trading decisions using an aroon indicator strategy.

Pros and Cons of Aroon Indicator Strategies

As with any trading strategy, there are advantages and disadvantages to using Aroon Indicator strategies.

Advantages

  1. Effective Trend Identification: Aroon Indicator strategies excel at identifying market trends, making them valuable for various trading styles.
  2. Versatility across Different Timeframes and Trading Instruments: The Aroon Indicator can be used effectively across different timeframes and financial instruments, including forex, stocks, commodities, and indices.
  3. Relatively Easy to Understand and Implement: Aroon Indicator strategies are relatively straightforward, making them accessible to traders of all experience levels.

Limitations

  1. Potential for False Signals: Like any technical indicator, Aroon Indicator strategies are not immune to false signals. It is essential to use additional technical tools and sound risk management to minimize the impact of false signals on your trading performance.
  2. The Need for Additional Confirmation Tools: To enhance the reliability of the Aroon Indicator’s signals, it is crucial to combine it with other technical analysis tools, such as trend-following indicators, oscillators, or support and resistance levels.
  3. Reduced Effectiveness in Sideways or Ranging Markets: The Aroon Indicator’s performance may be less reliable in ranging or sideways markets, as it primarily excels in identifying trend strength and reversals.

Tips for Successful Aroon Indicator Strategy Implementation

To make the most of an aroon indicator strategy, consider these tips and best practices:

  1. Choosing the Appropriate Timeframe: Select the right timeframe based on your trading style and strategy. Experiment with different timeframes to determine which one works best for you.
  2. Testing and Optimizing the Strategy with Backtesting: Before implementing an aroon indicator strategy in live trading, use backtesting to test and optimize the strategy based on historical data.
  3. Balancing Risk and Reward: Incorporate risk management techniques, such as setting appropriate stop-loss and take-profit levels, to ensure a healthy risk-reward ratio in your trades.
  4. Maintaining Discipline and Following a Trading Plan: Consistency is key in trading. Stick to your trading plan, and avoid impulsive decisions based on emotions or short-term market fluctuations.

Real-life Examples and Case Studies

To better understand the practical application of an aroon indicator strategy, let’s explore some real-life examples and case studies.

Successful Trades Using Aroon Indicator Strategies

In a strong uptrend, a trader might enter a long position when the Aroon Up line crosses above the Aroon Down line, signaling bullish momentum. Conversely, in a strong downtrend, a trader might enter a short position when the Aroon Down line crosses above the Aroon Up line, indicating bearish momentum.

Overcoming Challenges and Learning from Mistakes

In a ranging market, an aroon indicator strategy may produce false signals, leading to premature entries or exits. In such situations, it’s essential to combine the Aroon Indicator with other technical tools, such as support and resistance levels or trend-following indicators, to filter out false signals and improve the accuracy of your trading decisions.

Adapting Aroon Indicator Strategies to Various Market Conditions

An aroon indicator strategy can be adapted to different market conditions by adjusting the period parameter or combining it with other technical tools. For instance, in a volatile market, a trader may increase the period to reduce the sensitivity of the indicator, while in a less volatile market, they may decrease the period to capture shorter-term price movements.

aroon indicator strategy

Conclusion

In conclusion, Aroon Indicator strategies are valuable tools that can help traders identify trend strength, potential reversals, and capitalize on market trends. By incorporating an aroon indicator strategy into your trading approach and combining it with other technical tools and sound risk management, you can enhance your trading performance and achieve long-term success. Remember, continuous learning and practice are vital in the ever-evolving world of trading.

Master the Aroon Oscillator MT4: A Comprehensive Guide to Improve Your Trading Strategy

aroon oscillator mt4

Introduction

The MetaTrader 4 (MT4) platform is widely recognized as the go-to trading platform for Forex and CFD traders worldwide. Technical indicators play a significant role in helping traders make informed decisions and enhance their trading strategies. One such powerful tool is the Aroon Oscillator for MT4. In this comprehensive guide, we’ll explore the intricacies of the aroon oscillator mt4 and how you can use it to improve your trading performance.

Understanding the Aroon Oscillator

Before diving into the Aroon Oscillator, it’s crucial to understand the concept behind the Aroon Indicator, which forms the basis of this oscillator.

The Concept of the Aroon Indicator

The Aroon Indicator is a technical analysis tool designed to measure the strength of a trend and identify potential trend reversals. It consists of two lines: the Aroon Up and the Aroon Down lines.

  1. Aroon Up and Aroon Down Lines: The Aroon Up line measures the number of periods since the highest high within a specified period, while the Aroon Down line measures the number of periods since the lowest low within the same period. Both lines oscillate between 0 and 100.
  2. Time Periods and Calculations: The default period for the Aroon Indicator is typically 14, although traders can adjust it to suit their trading style. The Aroon Up and Aroon Down lines are calculated using the following formulas:

    Aroon Up = ( (14 – Periods since 14-day high) / 14 ) x 100 Aroon Down = ( (14 – Periods since 14-day low) / 14 ) x 100

Creating the Aroon Oscillator

The Aroon Oscillator is derived by subtracting the Aroon Down line from the Aroon Up line. This oscillator fluctuates between -100 and 100, with a zero line acting as the center point.

  1. Combining Aroon Up and Aroon Down Lines: To create the Aroon Oscillator, simply subtract the Aroon Down value from the Aroon Up value at each point in time.
  2. Oscillator Characteristics and Interpretation: The Aroon Oscillator provides valuable insights into trend strength and potential reversals. A positive value indicates bullish momentum, while a negative value suggests bearish momentum. Additionally, extreme values above +50 or below -50 can signal overbought or oversold market conditions, respectively.

Setting up the Aroon Oscillator on MT4

To use the aroon oscillator mt4 effectively, you’ll need to download, install, and configure it on your MT4 platform.

Downloading and Installing the Oscillator

As the Aroon Oscillator is not a default indicator on MT4, you’ll need to download it from a reliable source and install it manually. Once downloaded, copy the Aroon Oscillator file (usually a .mq4 or .ex4 file) to the ‘Indicators’ folder within your MT4 installation directory. After restarting the MT4 platform, the Aroon Oscillator should be available in the ‘Custom Indicators’ section of the platform’s Navigator window.

Configuring the Aroon Oscillator Settings

To set up the aroon oscillator mt4, follow these steps:

  1. Timeframe Selection: Choose a suitable timeframe for your trading strategy. Lower timeframes (e.g., 5-minute or 15-minute charts) are more suitable for short-term trading, while higher timeframes (e.g., daily or weekly charts) are more appropriate for long-term trading.
  1. Customizing Colors and Line Styles: You can customize the appearance of the Aroon Oscillator by right-clicking on the oscillator and selecting ‘Properties.’ Here, you can adjust colors, line styles, and other visual settings.
  2. Adjusting the Period Parameter: The default period for the Aroon Oscillator is usually set to 14, but you can adjust it to suit your trading style. Experiment with different period values to optimize the oscillator for your specific strategy.

Applying the Oscillator to a Chart

Once you have configured the aroon oscillator mt4 settings, simply drag the oscillator from the ‘Custom Indicators’ section of the Navigator window onto your chart. The Aroon Oscillator will appear in a separate window below the main chart, displaying its values over time.

Developing a Trading Strategy Using the Aroon Oscillator

To maximize the effectiveness of the aroon oscillator mt4, it’s essential to develop a well-rounded trading strategy that incorporates the oscillator’s signals.

Identifying Trade Opportunities

The Aroon Oscillator can help traders identify potential trade opportunities by generating bullish and bearish signals and highlighting overbought and oversold market conditions.

  1. Recognizing Bullish and Bearish Signals: A positive Aroon Oscillator value indicates a bullish trend, while a negative value suggests a bearish trend. Traders can use these signals to enter long or short positions accordingly.
  2. Interpreting Overbought and Oversold Conditions: When the Aroon Oscillator reaches extreme values above +50 or below -50, it can signal that the market is overbought or oversold. Traders can use this information to prepare for potential trend reversals or to exit existing positions.

Managing Risk with the Aroon Oscillator

Risk management is a critical aspect of any trading strategy. The aroon oscillator mt4 can help traders manage risk by providing insights into optimal stop-loss orders and take-profit targets.

  1. Setting Stop-Loss Orders: Traders can use the Aroon Oscillator to determine appropriate stop-loss levels by identifying support and resistance areas or recent swing highs and lows.
  2. Determining Take-Profit Targets: Similarly, traders can use the oscillator to establish profit targets based on historical price movements, resistance levels, or predetermined risk-reward ratios.

Combining the Aroon Oscillator with Other Technical Tools

The aroon oscillator mt4 can be even more effective when used in conjunction with other technical analysis tools. Here are some popular technical tools that complement the Aroon Oscillator:

  1. Trend-Following Indicators: Indicators like moving averages or the ADX (Average Directional Index) can help confirm the overall market trend and increase the reliability of the Aroon Oscillator’s signals.
  2. Oscillators: Other oscillators, such as the Relative Strength Index (RSI) or the Stochastic Oscillator, can provide additional confirmation of overbought or oversold conditions and potential trend reversals.
  3. Support and Resistance Levels: Identifying support and resistance levels using tools like trendlines, pivot points, or Fibonacci retracements can help traders anticipate price movements and enhance their aroon oscillator mt4 strategy.
aroon oscillator mt4

Pros and Cons of Using the Aroon Oscillator

The Aroon Oscillator offers several advantages and disadvantages that traders should be aware of:

Advantages

  1. Identifying Trend Strength and Reversals: The aroon oscillator mt4 excels at gauging trend strength and pinpointing potential trend reversals, making it a valuable tool for various trading styles.
  2. Adaptability to Different Trading Styles and Instruments: The Aroon Oscillator is versatile and can be used effectively across different timeframes, trading styles, and financial instruments, including forex, stocks, commodities, and indices.
  3. Clear Overbought and Oversold Signals: The oscillator provides clear signals for overbought and oversold market conditions, helping traders identify potential reversal points.

Limitations

  1. Potential for False Signals: Like any technical indicator, the Aroon Oscillator is not immune to false signals. It is essential to use additional technical tools and sound risk management to minimize the impact of false signals on your trading performance.
  2. The Necessity for Additional Technical Tools for Confirmation: To enhance the reliability of the Aroon Oscillator’s signals, it is crucial to combine it with other technical analysis tools, such as trend-following indicators, oscillators, or support and resistance levels.
  3. Limited Effectiveness in Ranging Markets: The Aroon Oscillator’s performance may be less reliable in ranging or sideways markets, as it primarily excels in identifying trend strength and reversals.

Real-Life Examples and Case Studies

To better understand the practical application of the aroon oscillator mt4, let’s explore some real-life examples and case studies.

Successful Trades Using the Aroon Oscillator

In a strong uptrend, a trader might enter a long position when the Aroon Oscillator crosses above the zero line, signaling bullish momentum. Conversely, in a strong downtrend, a trader might enter a short position when the oscillator crosses below the zero line, indicating bearish momentum.

Examples of False Signals and Lessons Learned

In a ranging market, the Aroon Oscillator may produce false signals, leading to premature entries or exits. In such situations, it’s essential to combine the oscillator with other technical tools, such as support and resistance levels or trend-following indicators, to filter out false signals and improve the accuracy of your trading decisions.

Adapting the Aroon Oscillator to Various Market Conditions

The aroon oscillator mt4 can be adapted to different market conditions by adjusting the period parameter or combining it with other technical tools. For instance, in a volatile market, a trader may increase the period to reduce the sensitivity of the oscillator, while in a less volatile market, they may decrease the period to capture shorter-term price movements.

Tips and Best Practices for Using the Aroon Oscillator

To make the most of the aroon oscillator mt4, consider these tips and best practices:

  1. Choosing Appropriate Timeframes: Select the right timeframe based on your trading style and strategy. Experiment with different timeframes to determine which one works best for you.
  2. Balancing Risk and Reward: Incorporate risk management techniques, such as setting appropriate stop-loss and take-profit levels, to ensure a healthy risk-reward ratio in your trades.
  3. Remaining Disciplined and Following Your Trading Plan: Consistency is key in trading. Stick to your trading plan, and avoid impulsive decisions based on emotions or short-term market fluctuations.
aroon oscillator mt4

Conclusion

In conclusion, the Aroon Oscillator is a valuable technical tool that can help traders identify trend strength, potential reversals, and overbought or oversold market conditions. By incorporating the aroon oscillator mt4 into your trading strategy and combining it with other technical tools and sound risk management, you can enhance your trading performance and achieve long-term success. Remember, continuous learning and practice are vital in the ever-evolving world of trading.

Aroon Indicator MQL5: A Comprehensive Guide for Forex Traders

Aroon Indicator MQL5

Introduction

The Aroon Indicator is a powerful technical analysis tool developed by Tushar Chande in 1995. It helps traders identify the strength and direction of market trends, as well as potential trend reversals. The MetaTrader 5 (MQL5) platform is a popular trading platform that offers advanced technical analysis tools, including the Aroon Indicator. In this article, we will explore the Aroon Indicator MQL5 and its various applications in forex trading.

Differences between MetaTrader 4 (MT4) and MetaTrader 5 (MQL5)

Before delving into the Aroon Indicator MQL5, it is essential to understand the differences between the MetaTrader 4 (MT4) and MetaTrader 5 (MQL5) platforms, as well as the advantages of using MQL5.

  • Comparison of the two platforms: MetaTrader 4 (MT4) is a widely used forex trading platform known for its user-friendly interface and extensive range of technical analysis tools. In contrast, MetaTrader 5 (MQL5) is a more advanced platform that offers additional features and improvements over MT4, including enhanced technical analysis capabilities, faster execution speeds, and support for a broader range of financial instruments.
  • Advantages of using MetaTrader 5: Some of the key benefits of using MQL5 over MT4 include improved charting capabilities, a built-in economic calendar, depth of market functionality, and the ability to code and test custom indicators and trading strategies using the MQL5 programming language.

Installing the Aroon Indicator on MetaTrader 5

To start using the Aroon Indicator MQL5, you need to install it on the MetaTrader 5 platform. Follow this step-by-step guide to achieve this:

  1. Locating the Aroon Indicator within the MQL5 platform: To find the Aroon Indicator on MQL5, open the platform and click on the “Insert” menu at the top of the screen. Then, navigate to “Indicators” > “Custom” > “Aroon” to access the Aroon Indicator.
  2. Step-by-step guide to installing the Aroon Indicator on MQL5: After locating the Aroon Indicator in the “Custom” menu, double-click on it to open the “Aroon” window. In this window, you can customize the Aroon Indicator settings, such as the lookback period and the colors of the Aroon Up and Aroon Down lines. Once you’re satisfied with your settings, click “OK” to add the Aroon Indicator to your chart.
  3. Customizing the Aroon Indicator settings and appearance: You can further customize the Aroon Indicator MQL5 by right-clicking on the chart, selecting “Indicators List,” and then clicking on “Aroon” to access its properties. From there, you can adjust the line colors, line thickness, and other visual aspects of the indicator to suit your preferences.

Understanding the Aroon Indicator on MQL5

Once the Aroon Indicator MQL5 is installed and customized, it’s time to learn how to interpret its signals and use it effectively in your forex trading strategy. Here are some key points to consider when using the Aroon Indicator on MQL5:

  1. Explanation of the Aroon Up and Aroon Down lines: The Aroon Indicator consists of two lines, the Aroon Up and the Aroon Down. These lines measure the number of periods since the highest high and the lowest low, respectively, within a specific lookback period. By default, the lookback period is typically set to 14 periods. The Aroon Up and Aroon Down lines are plotted on a scale of 0 to 100, with higher values indicating stronger trends.
  1. Interpreting the Aroon Indicator values and signals: The relationship between the Aroon Up and Aroon Down lines can provide valuable insights into the strength and direction of market trends. When the Aroon Up line is above the Aroon Down line, it indicates that the market is in an uptrend. Conversely, when the Aroon Down line is above the Aroon Up line, it suggests a downtrend. A crossover between the two lines can also signal a potential trend reversal.

Trading Strategies with the Aroon Indicator on MQL5

The Aroon Indicator MQL5 can be incorporated into various trading strategies to help traders make informed decisions in the forex market. Here are some examples of Aroon Indicator-based trading strategies:

  1. Trend-following strategy: When the Aroon Up line is significantly above the Aroon Down line, traders can consider entering long positions to take advantage of the uptrend. Similarly, when the Aroon Down line is significantly above the Aroon Up line, traders can consider entering short positions to capitalize on the downtrend.
  2. Trend reversal strategy: Traders can watch for crossovers between the Aroon Up and Aroon Down lines as potential signals of trend reversals. For instance, if the Aroon Up line crosses above the Aroon Down line after a downtrend, traders may consider entering a long position in anticipation of a new uptrend.

Combining the Aroon Indicator with Other Technical Analysis Tools on MQL5

To increase the effectiveness of the Aroon Indicator MQL5, traders should consider combining it with other technical analysis tools, such as moving averages, oscillators, or support and resistance levels. By incorporating multiple indicators into their trading strategies, traders can reduce the likelihood of false signals and improve their overall trading performance.

Aroon Indicator MQL5

Aroon Indicator Alerts and Notifications on MQL5

To stay informed about potential trading opportunities, traders can set up custom alerts and notifications based on the Aroon Indicator MQL5 signals. To do this, right-click on the chart, select “Indicators List,” and click on the “Aroon” indicator to access its properties. From there, navigate to the “Alerts” tab and set up your desired alerts, such as email notifications, push notifications, or sound alerts, for specific Aroon Indicator events, like crossovers or extreme values.

Limitations and Drawbacks of the Aroon Indicator on MQL5

Despite its usefulness, the Aroon Indicator MQL5 has some limitations and drawbacks that traders should be aware of:

  1. Challenges in volatile markets: The Aroon Indicator can generate false signals in volatile markets, leading to potential losses. To mitigate this risk, traders should use additional analysis tools and techniques to confirm the Aroon Indicator’s signals.
  2. Reliance on the Aroon Indicator alone for trading decisions: While the Aroon Indicator MQL5 can provide valuable insights into market trends, it should not be the sole basis for trading decisions. Traders should incorporate other technical analysis tools, fundamental analysis, and sound risk management practices into their overall trading strategy to increase their chances of long-term success in the forex market.
Aroon Indicator MQL5

Conclusion

The Aroon Indicator MQL5 is a powerful tool for identifying trend strength, direction, and potential reversals in the forex market. By understanding how to use the Aroon Indicator effectively and incorporating it into a well-rounded trading strategy, traders can make more informed decisions and potentially increase their profitability. However, it is important to be aware of the limitations of the Aroon Indicator MQL5 and not rely solely on it for trading decisions. By combining it with other technical analysis tools, traders can reduce the risk of false signals and make more informed trading decisions.

Overall, the Aroon Indicator MQL5 is a valuable addition to any forex trader’s technical analysis toolkit. By following the steps outlined in this article, traders can easily install and customize the Aroon Indicator on the MetaTrader 5 platform and start incorporating it into their trading strategies. With proper use and risk management, the Aroon Indicator MQL5 can help traders achieve their forex trading goals and ultimately succeed in the competitive forex market.